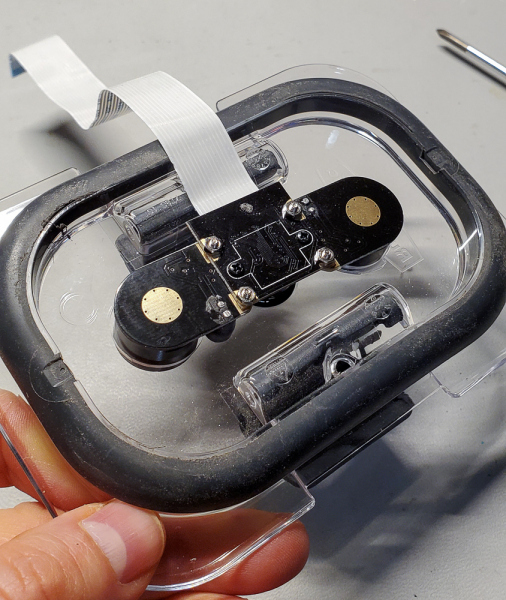
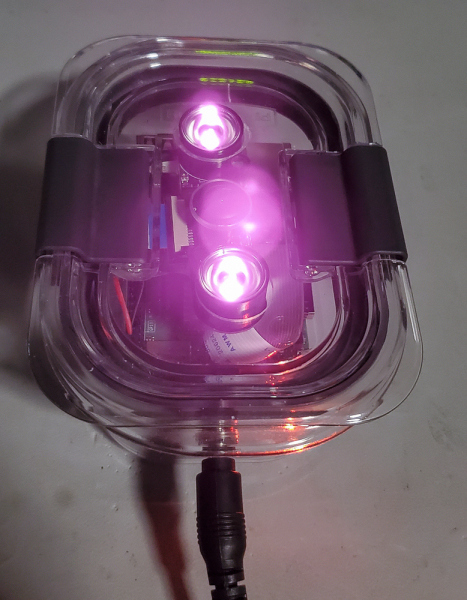
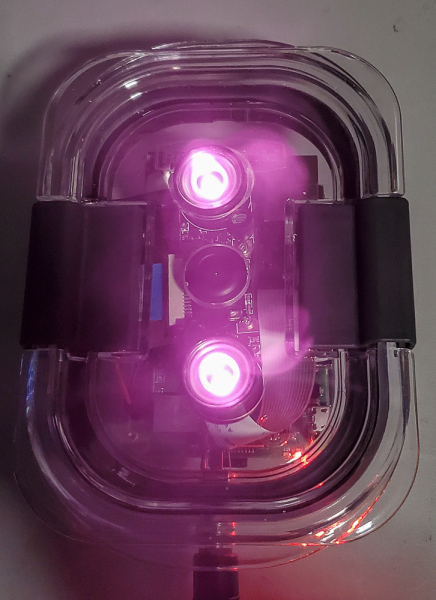
Requires power and wireless network access.
Shopping List:
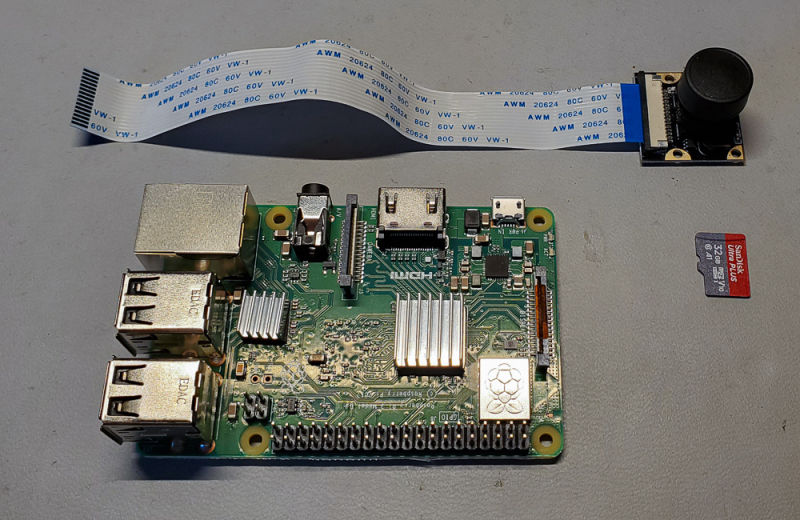
- Raspberry Pi Model 3b+: I suggest the model 3b+ because there is a reasonable trade off between compute power required to process video and the heat it generates.
- Raspberry Pi Camera: There are some options here, I suggest a Pi camera that can see infra-red since most of the images will be at night, also one that includes Infrared LED’s for a source of light. Here is a link to the one I used: Infrared Pi Camera there are a couple of versions on that page I used the narrow view camera.
- Power Supply: I used a 5 Amp 5v power supply for my camera, you can get by with a smaller one depending on the power requirements of the Infra-Red LED’s (which draw a fair amount of power). This requires some soldering and more advanced wiring.
- Micro SD Card: Minimum 32gig and make sure you get a card that is rated for at least HD video (UHS-I/Class 10) – but faster is better. I used a 32 gig SanDisk Ultra Plus. I would not recommend generic cards like the ones you can get at Micro Center – they don’t hold up to the write/erase cycles these cameras will perform.
- Misc Wire/Connectors:
- Power jack: 2.1mm Barrel Connector Female
- DuPont Connectors: [Here]
- M2 Standoffs and Screws: for Mounting the Pi: [KIT on Amazon]
- Pi Heat Sinks: Apply these to the to largest chips on the top of the Pi there peel and stick.
- Silicone Caulk – Clear
- Zip Ties – UV Safe (Black ones @ Home Depot)
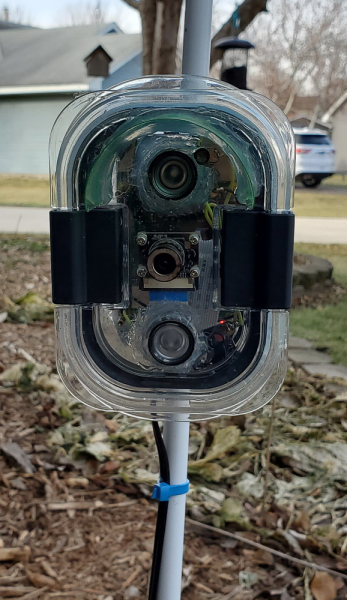
- Enclosure and mounting hardware What you use for an enclosure will depend on a few things. 1. The camera you use. 2) the placement and space required for the Infra red Illumination. Here is what used Rubbermaid 1.3 Cup leak proof and a 16oz pop bottle. Mine is no longer leak proof.. 🙂 For a mounting pole I bought a fiberglass electric fence post from fleet farm. Here is a link to what i got on amazon – although the minimum order there is 10 posts which is why I went to fleet farm..
Pi Build:
- Download MotionEye OS make sure you get the version that is for your model of Pi.
- Main Download Page if you need a different version: <here>
- Pi 3 current version is this file: motioneyeos-raspberrypi3-20200606.img.xz
- Initial OS configuration steps can be found <here>
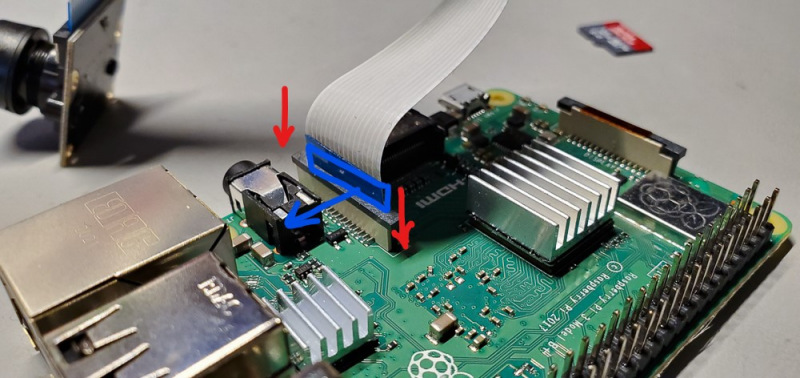
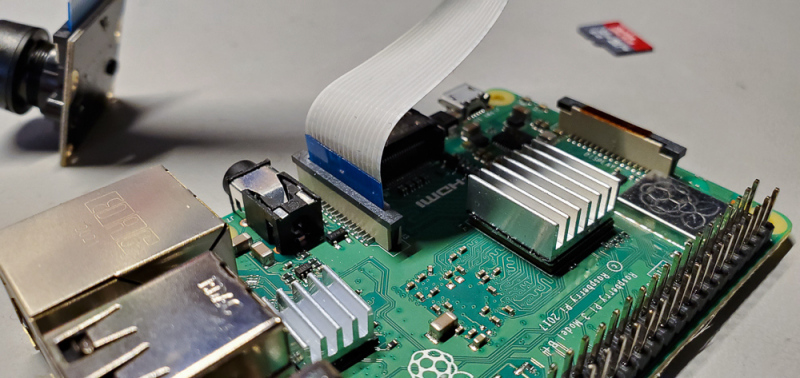
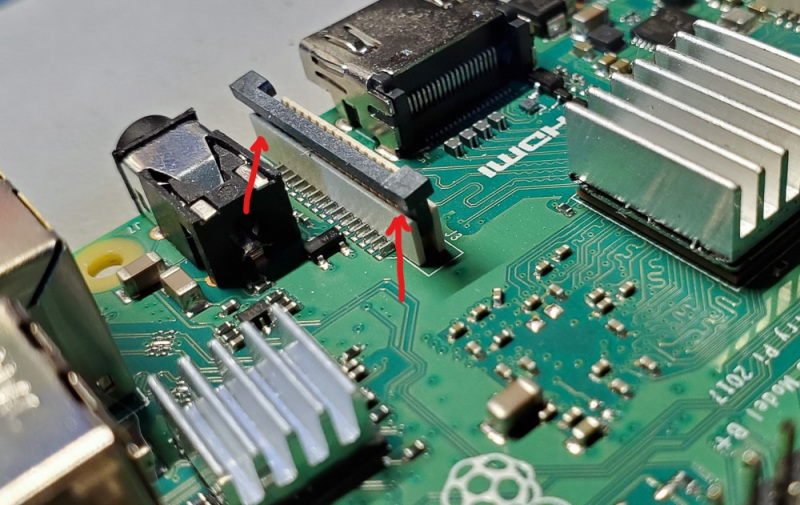
- Camera Installation: See the photos below:
- lift up on the black portion of the connector on the Pi (see photo for the right connector)
- Insert the ribbon cable with the blue side facing the Ethernet port (see photo)
- Push the black portion of the connector down to lock the cable.
- Gently pull the ribbon cable to make sure it’s solid in the connector.
- Put the micro SD card in the slot on the Pi if you haven’t already.
- if you have a HDMI monitor and USB keyboard you can connect them.
- Power up the Pi. (for now use a micro usb charger to do this)
- Wait for the OS to come up.
- If you have a monitor you should be able to get the IP address off the boot up sequence. If you don’t you can use a network scanner to find the PI’s IP address or look on your router/Wireless connected device.
- Open a web browser on a windows computer to: HTTP://X.X.X.X where X.X.X.X is the IP address of your Pi.
- You should be greeted with by login screen that looks like this:
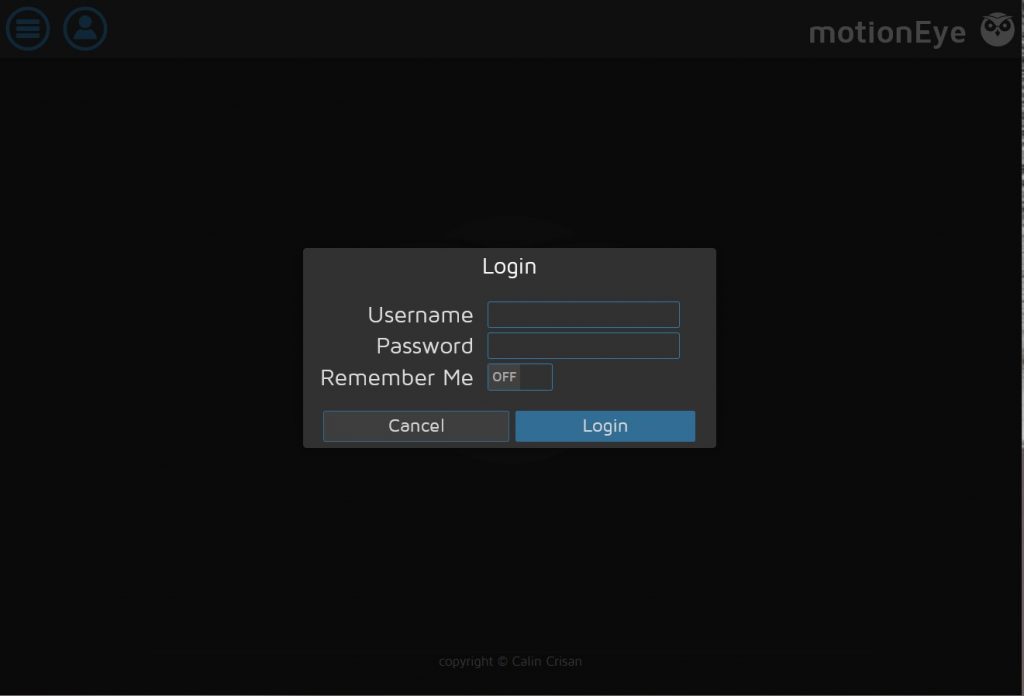
- Login: admin/<no password>.
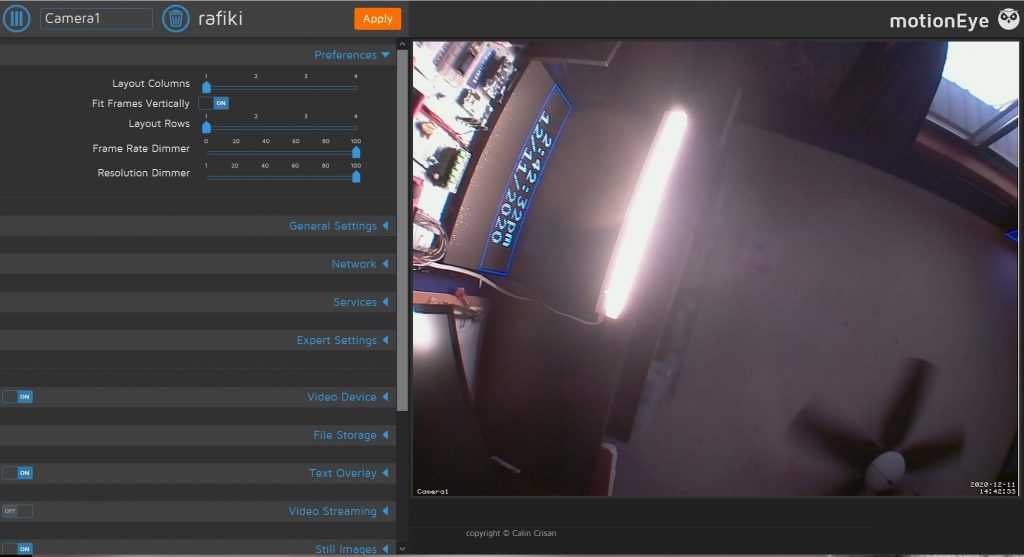
- I use the following settings, they seem to work pretty well for me, when you setup the camera try to point it somewhere that don’t have a lot of things that move with the wind because that will trigger the motion activated captures.
- General Settings:
- Change the Admin Password
- Set the TimeZone
- Set the Hostname
- Network settings
- Setup a static IP if you want to.
- Expert Settings
- If you want to know how many Frames/Per second the Pi is currently processing turn on “Enable System monitor”
- Video Device
- Rename the camera if you want to [Camera Name]
- Video Resolution. I use [1600×1200] be aware that different resolutions allow you to see more or less of the scene because of aspect ratio changes..
- if you need to rotate the camera change: [Video Rotation]
- Frame Rate: The Pi seems to handle 10 FPS fairly well at this resolution that is what i use.
- Text Overlay [ON] – this is the text that appears on the images/video
- Left Text: [Camera name]
- Right Text: [Timestamp]
- Text Scale: 2
- Video Streaming [ON] – if you want to allow people to see live streaming video you can set this up
- Stream Frame Rate: [10]
- Streaming Quality: ~[60%]
- Still Images: [ON]
- Image Quality: [80%]
- Capture Mode: [Motion Triggered] this option can generate 1000’s of images a day, you can also choose [motion triggered – One Picture] which will take alot less.
- Preserve Pictures: I would recommend start with [one week] and see how the disk space on the card goes..
- Enable Manual Snapshots: [on]
- Movies: [ON]
- Recording Mode: [Motion triggered]
- Preserve Movies: [For one Week] tune this to the activity on your camera
- Motion Detection: [ON]
- Frame Change Threshold: [1.5%]
- Auto noise detection: [ON]
- General Settings:
Pretty much everything else is Default and some of what I described above is also default. MAKE SURE YOU HIT THE APPLY BUTTON to actually make the changes take effect and save them.
Enclosure Build:
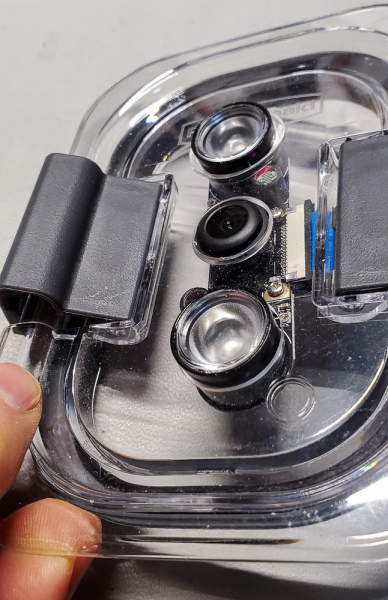
Shutdown the PI if it’s currently running – disconnect the Power supply then Attach the Illumination LED’s to the sides of the camera module with the included screws.
You will need to drill 3 holes in the top of the enclosure(I used a stepped cutter for this), one for the camera and 2 for the LED’s. try to make the holes as tight as you can to the camera and LED’s spacing is important or things won’t fit. You can use the silicone to glue in the LED’s and close the gaps around the camera.
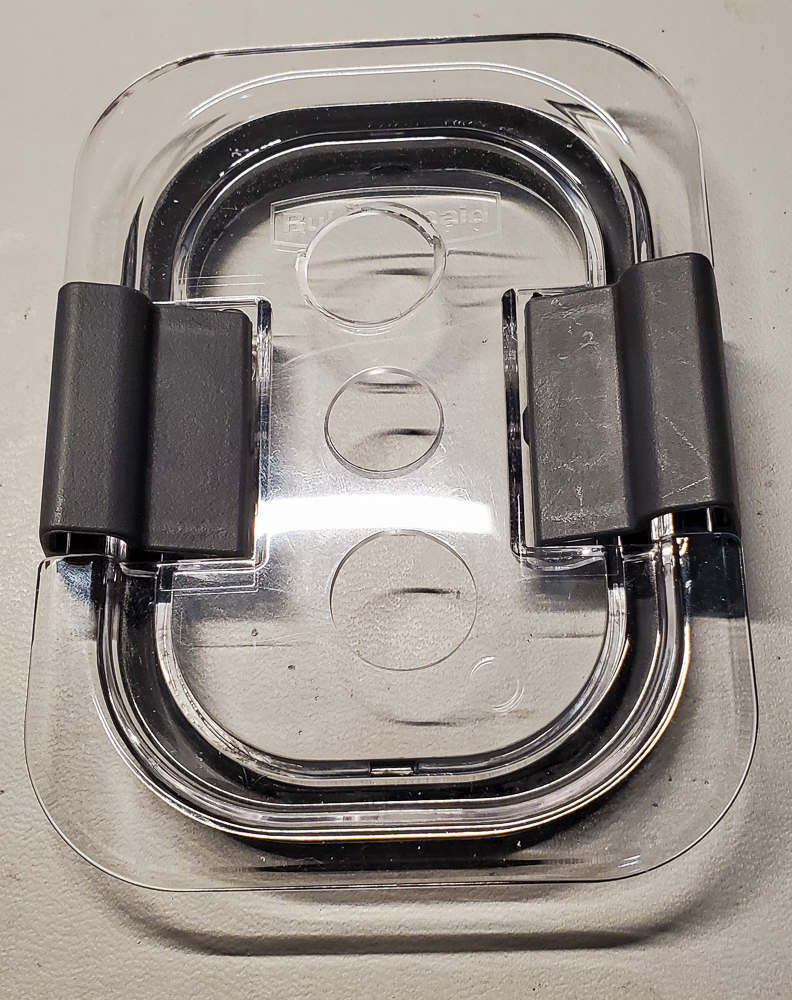
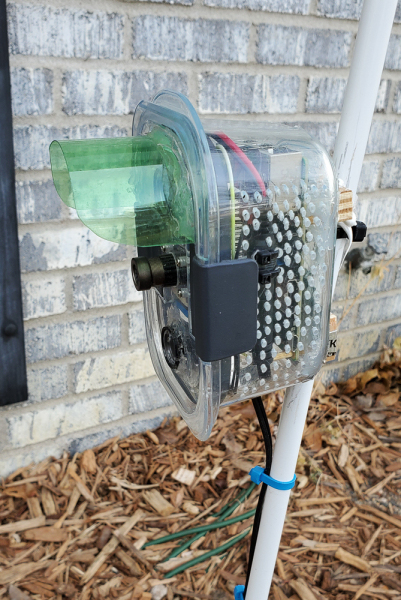
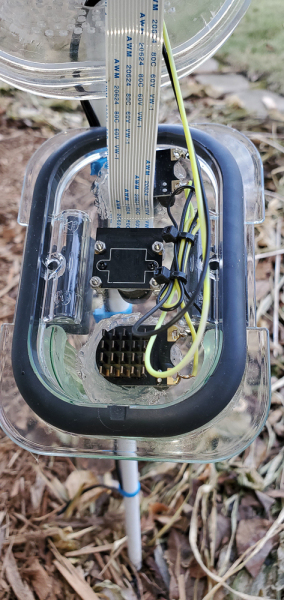
Next cut a flat rectangular piece of the pop bottle to be used for the shield above the top LED. Round the corners on one side. Glue the other side in an arc similar to the curve of the pop bottle above the top LED. it will look something like this from the side.
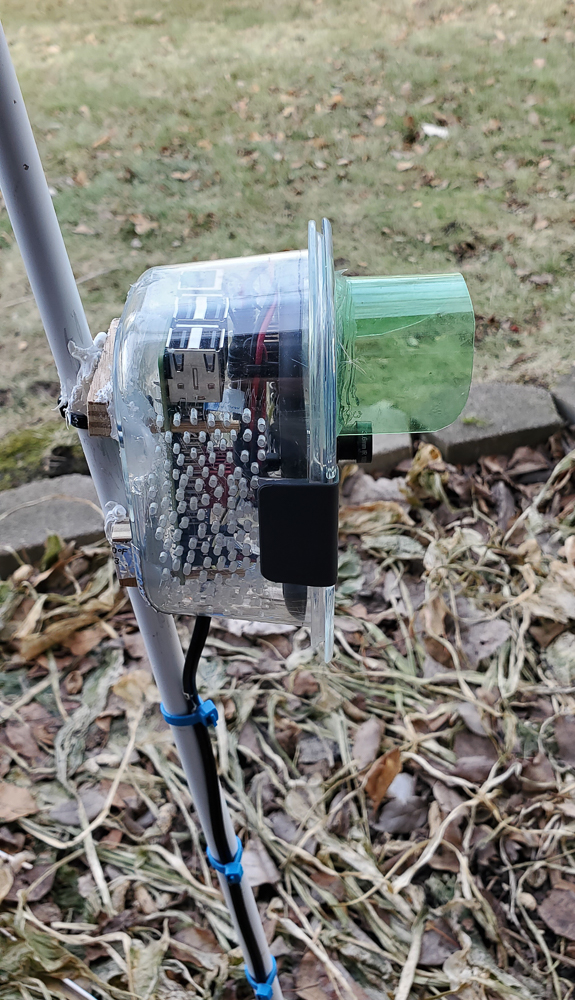
That will keep most rain off the lens.
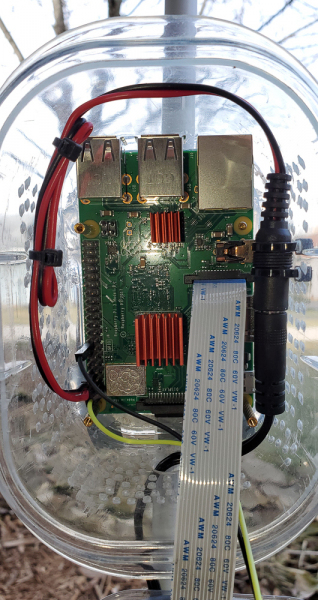
Create the Power cable. Because the case is too small for a USB connector to plug into the side of the PI were going to create a cable that plugs into the pins on the side of the PI. Take two wires of the Dupont connectors with Female connectors on one end (preferable black and white, or red and black) cut the end off with the male connector leaving a cable with two female DuPont connectors on it. See image (red circle is the Dupont Female connectors, Blue end if the 2.1mm connector soldered on and with optional heat shrink added.

When you solder the red and black connectors to the 2.1mm jack make sure the RED wire goes to the center conductor of the plug, and the black to the outside. If you get this wrong you can fry the Pi.
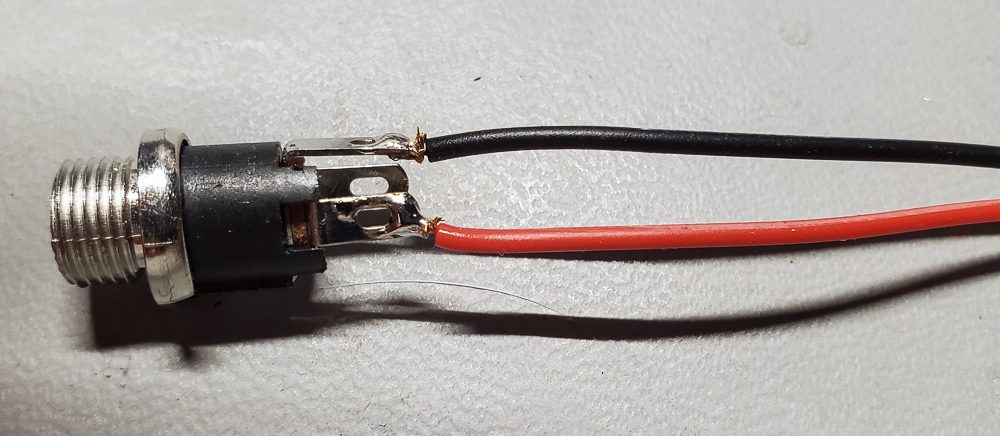
When you get the cable complete, The next step is to connect it to the Pi, this will be the power supply for the Pi, so its important to get this right. See the image below for placement of the connectors on the Pi board.
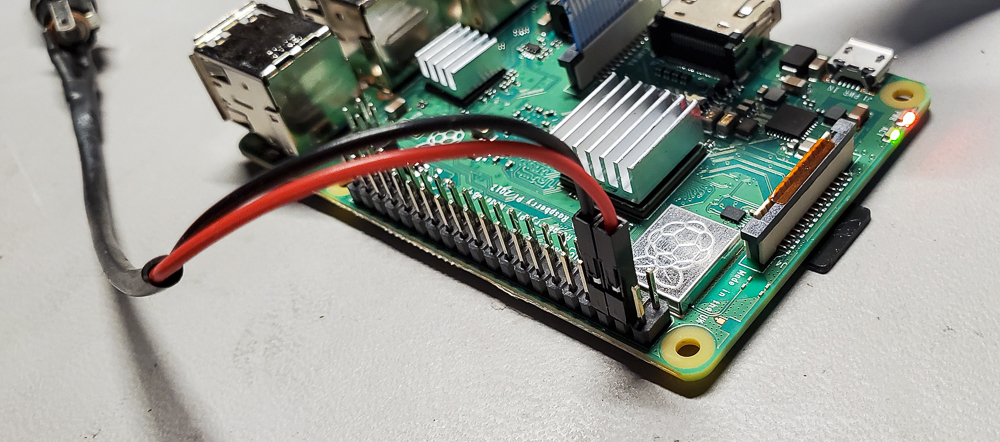
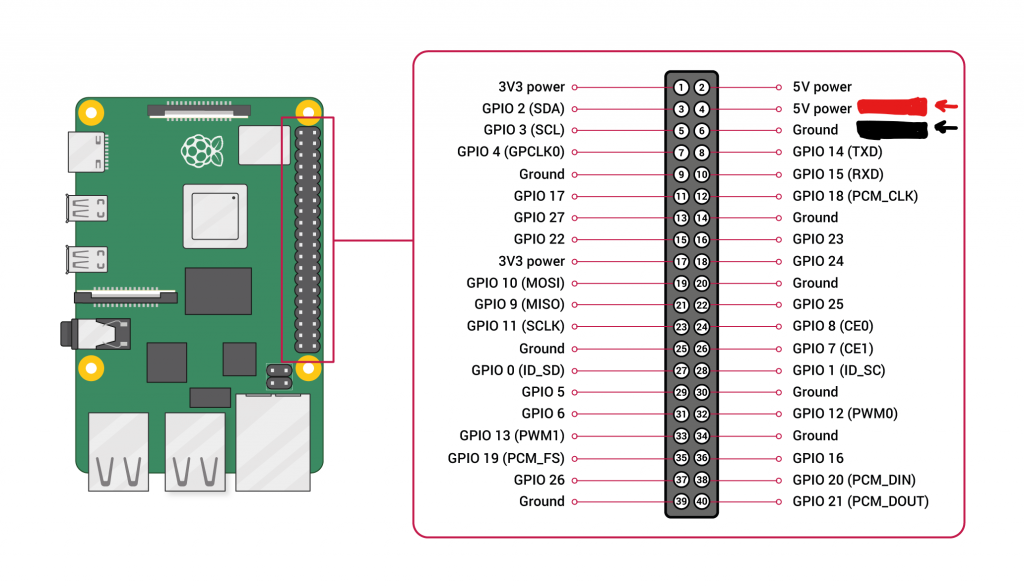
At this point feel free to test the Pi by connecting the power to the new cable, the Pi should come up just as it did before, if you don’t see the LED come on immediately disconnect it and review the wiring, unfortunately this is do or die; there is no protection on these pins for reverse polarity so if its wrong you may destroy the pi. So hoping that everything went well, use the web page to shut down the pi. Next we drill a hole for power in the enclosure, and then some air holes.
Before we drill any holes we need to add some standoffs to the Pi so we can mount it in the enclosure later. In the standoff kit, look for two standoffs about an inch long, one threaded all the way through and one with a screw end on it. they look like the image below:
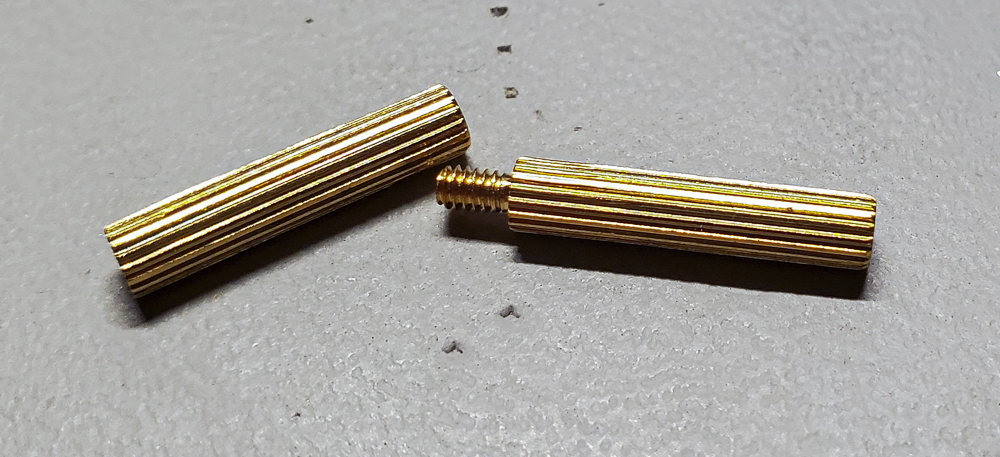
You will need 4 sets of these. put the screw end through a mounting hole from the bottom of the pie and screw the other standoff onto the top. do this on all 4 corners. The bottom standoff will eventually be put into silicon in the enclosure to mount it. the top standoff makes it easy to unscrew them so you can remove and work on the Pi later.
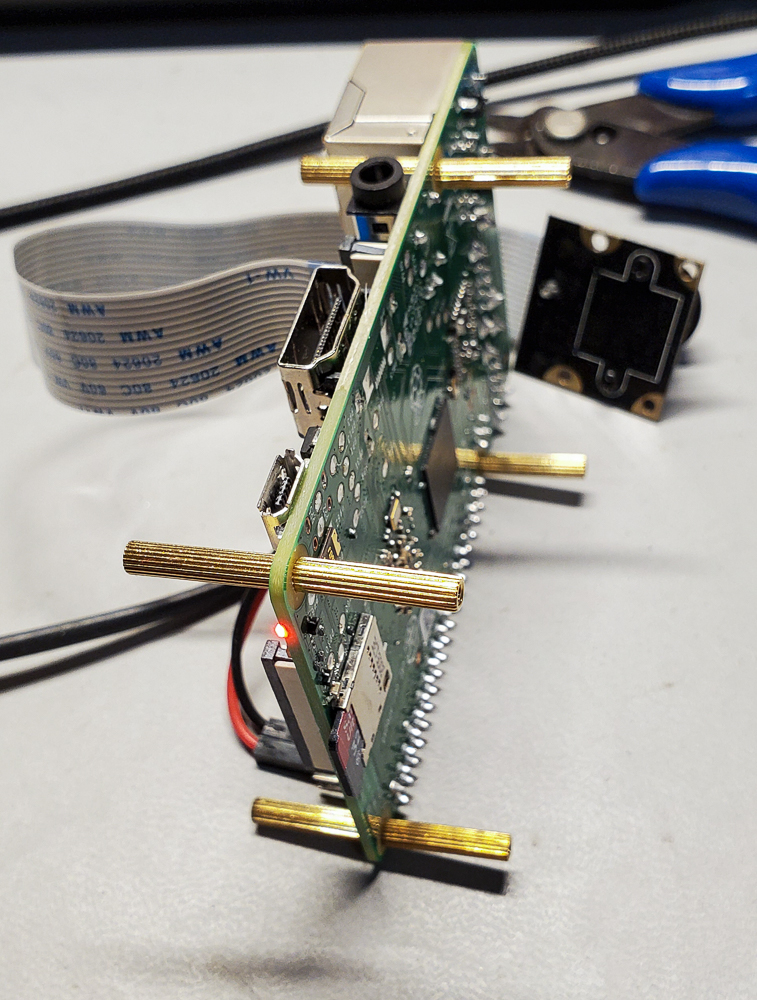
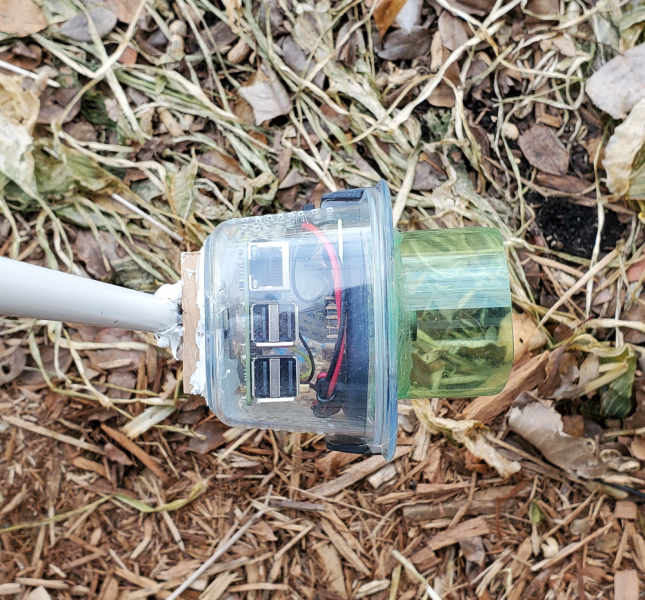
Now that you have all the standoffs installed, put the pi in the bottom of the enclosure. the USB/Ethernet ports will be to the top of the camera. Push the Pi towards the top end of the enclosure. Now figure out a spot on the bottom small side of the enclosure to put the hole for the power connector, you want this on the bottom so any water runs down the cable and not into the enclosure.
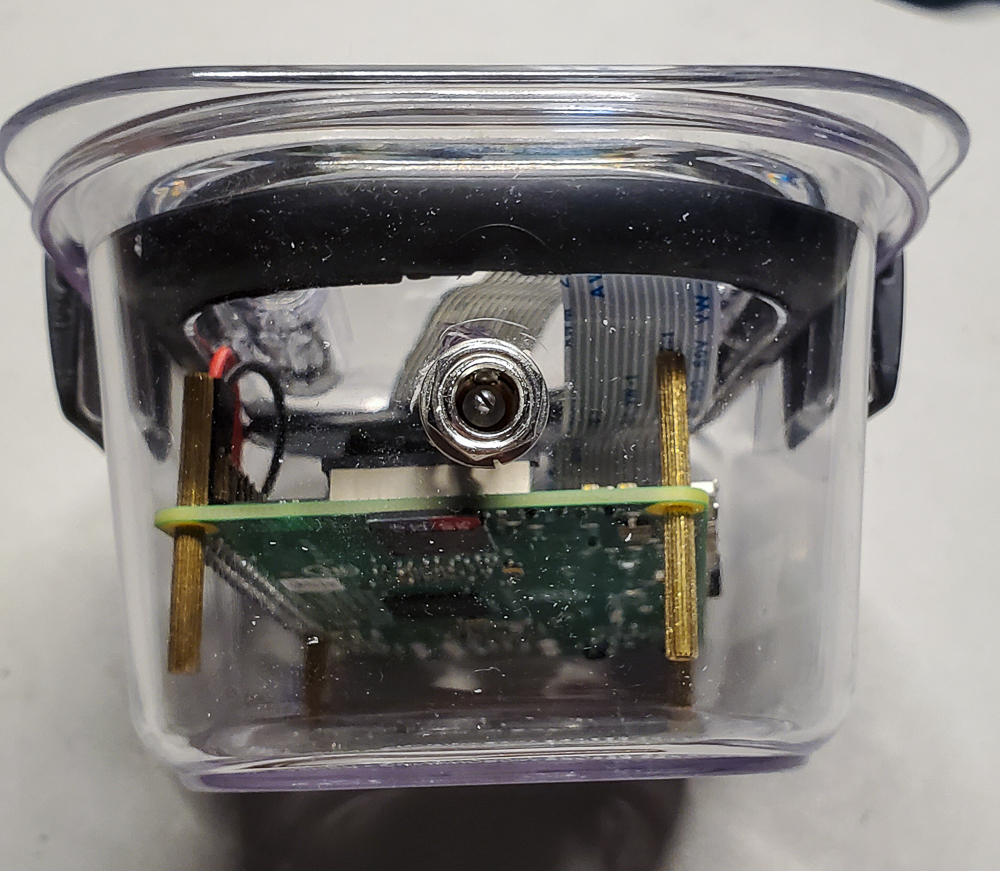
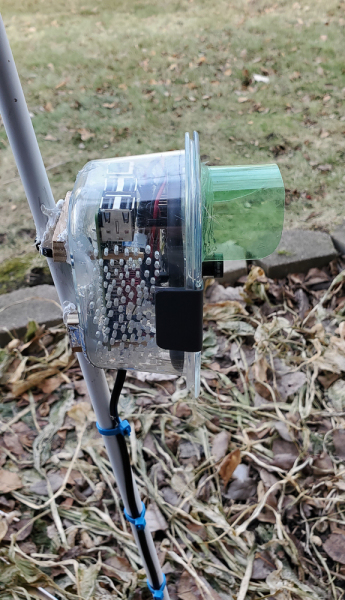
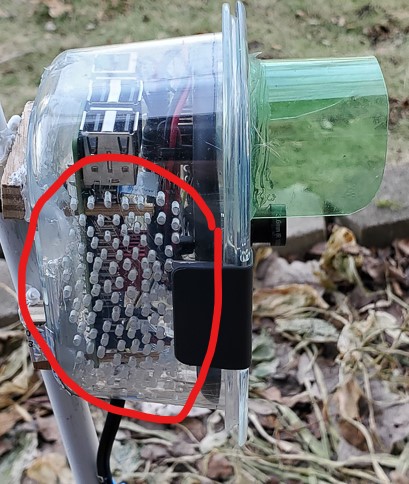
The Drill bit size for the plug I used was 5/16. OK almost there, now you need to drill a bunch of holes on the sides and bottom preferably 1/16 in drill angles down so when your looking at the camera the drill holes should point down in relation to the top of the enclosure so if water runs down the side of the enclosure it will not run into the holes. these provide for cooling for the Pi. Those LED’s and the Pi both generate a fair amount of heat and if you don’t provide cooling it will eventually crash – especially when it’s hot outside.
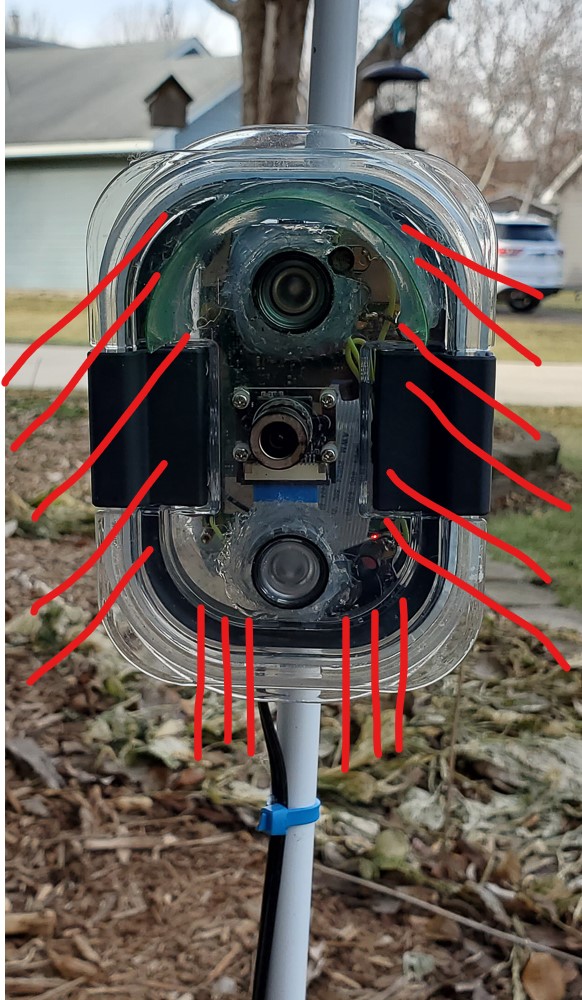
Drill a couple of holes (1/4 drill) Spaced about 1/2inch apart on the back/bottom under the pi and feed a couple of zip ties through this will allow you to mount the camera to the pole. Be careful not to stress these holes too much or they will break the bottom of the enclosure.
Once your done drilling all the holes… you can mount the Pi to do that put gobs of silicone caulk in the bottom of the enclosure where the standoffs on the bottom of the pi connect with the bottom of the enclosure. remember to position the Pi so it’s towards the top of the enclosure giving a little room on the bottom.
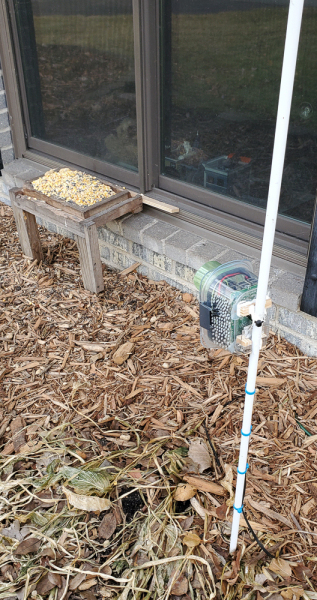
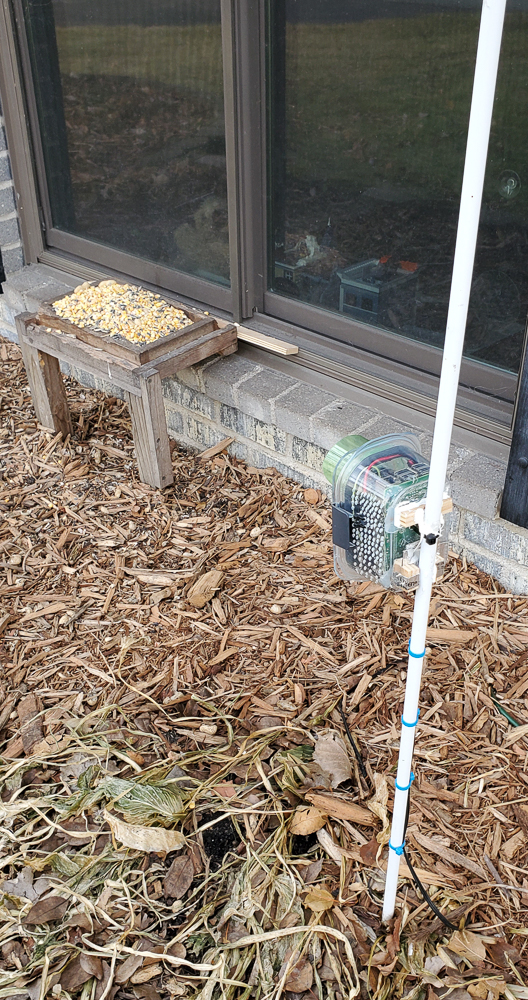
Once that is Dry, you can close it up. Find a place to put the camera. Pound the stake into the ground run power out to it. Zip tie it to the post(I ended up putting a small scrap of wood above the zip tie between the enclosure and the post to angle the camera down a little bit. I would recommend wrapping the power supply in heavy plastic and closing the ends tightly with zip ties so it won’t get wet(this is by no means a perfect water tight containment so be careful, i put the end of the extension cord and the whole 120v power cord for the power supply, and the power supply its self in this).
Power it up and Enjoy… let me know how it goes and if you need help or want me to check anything along the way let me know.
