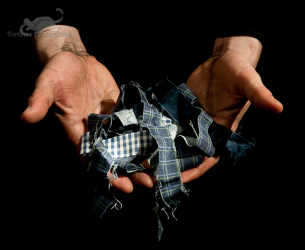
Recently a photography club I am part of had the topic of “Tangled in Blue” for a competition. It didn’t take me long to come up with an idea and enlist the aid of my husband, Geoff to produce an image. I thought it might interest some to see the process behind the photo, both in setting it up and in the digital processing afterward.
It should be noted that a lot of the processing done in Photoshop was me feeling my way around my process and none of the steps I took should be taken as a formula for producing exactly the same effect. It is my feeling that recipes are a good basis, but to create a truly great “dish” you must feel free to experiment according to your own tastes. (Hopefully that explains some of the strange twists and turns…)In Studio:
Equipment used: Nikon D300, 24-70mm f2.8, two Nikon SB800 strobes on light stands
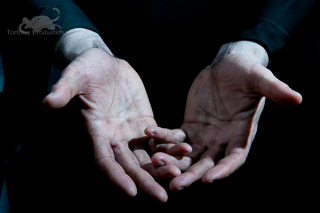
First off I had Geoff dress completely in black and pose for me against a black backdrop/floor. This was to ensure that his hands (the primary subject) would be emphasized. Bare bulb strobes were placed up high on light stands, one to his right and the other, slightly lower, to his left.
Secondly, as I wanted a truly gritty feel to Geoff’s hands, I had him get them as dirty as he could by dipping them into a bag of potting soil I had available.
no images were found
Shot one is a lighting test – as you can see, adjustment to the strobe position and strength was needed.
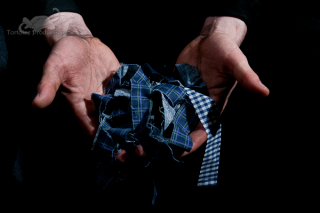
After a bit of fiddling, strobe positioning and strength were attained.
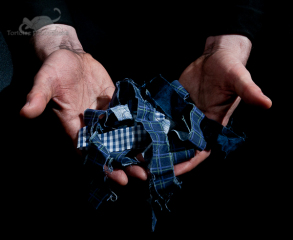
Strobe camera-left: 1/4 power — Strobe camera-right: 1/8 power Now it was time to add the “Tangled in Blue” element, fabric strips from my stash of craft materials.I soon realized all the fabric strips were the same and by adding a couple different patterns I would get a little diversity.
After more strip adjustment I had a setup that pleased me.
We spent another hour experimenting with the “dirty hands” setup and came up with quite a few good photos that will be used in future artistic and stock endeavors
Lightroom 3 Processing:
All the images from the shoot were loaded into Lightroom 3 and given a bit of basic processing:
- 1. Lens Corrections – enable profile corrections for a Nikkor 24-70mm
2. Clarity and Vibrance (in Basic, under Presence) set to +25
And then on to the specific processing on the image that best fit the topic of “Tangled in Blue”:
1. Cropping
2. Background slightly darkened to remove traces of the cuffs of Geoff’s shirt (Brush mask)
3. Fabric strips brightened and saturated (Brush mask)
4. White balance temperature raised from 5000 to 7057
5. White balance tint reduced from -10 to -22
6. Vibrance reset to zero
Export into Photoshop CS5:
Photoshop CS5 Processing:

1. Background layer duplicated and Shadow/Highlights adjustment performed. Also a bit of cloning performed on a problematic bright area on the camera-right hand

2. Hue/Saturation adjustment layer with black background masked out: Master Saturation -63, Master Lightness -10

3. Curves adjustment layer with black background masked out: subtle S curve to bring out lines on palms – Overlay mode

4. Channel Mixer adjustment layer (Monochrome – Red +40, Green +40, Blue: +20) with black background masked out: 50% Opacity

5. Blue painted on separate layer (hands masked out) to add color back to fabric strips: Overlay mode at 50% Opacity and 72% Fill
6. Dodge/Burn layer (50% grey layer – Soft Light mode) – lightening up camera right palm and further darkening down of sleeve cuffs and top background


7. Further adjustment to that pesky camera-right hand

8. Levels adjustment layer to to brighten up everything even more: (I’ll admit, I used Auto!)
9. Stamp layer to bring everything together.
10. Duplicate stamp layer.
11. High Pass Filter on Stamp layer (step 9) to sharpen up hands: Radius 6, Layer mode = Hard Light, 50% Opacity


12. Smart Sharpen Filter on duplicate stamp layer (step 10) with hands masked out to sharpen only fabric strips
13. Test print – top of camera-right thumb/wrist and camera-left wrist seemed a bit bright, so I added another Dodge/Burn layer (step 6) to darken them down


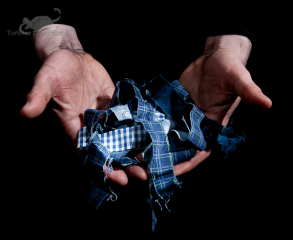
Final Image:

Hopefully this will give you some ideas on how to get that dirty and gritty feel to your portraits.
Thanks for reading! – Holly Kuchera
